Create an Autoresponder Campaign
The autoresponder campaigns allow users to automatically send an email when a previously specified event occurs.
The advantage of these campaigns is that they allow you to predefine simple answers at the time you consider most interesting for sending. In case you need to create more complex automatic flows, see the information about our Automations feature.
Create an autoresponder campaign
Creating an autoresponder campaign is very similar to creating a regular one. The only difference is that you will find one more step in which you will have to define the trigger (an event that starts the automatic sending) and the time of the sending of campaign.
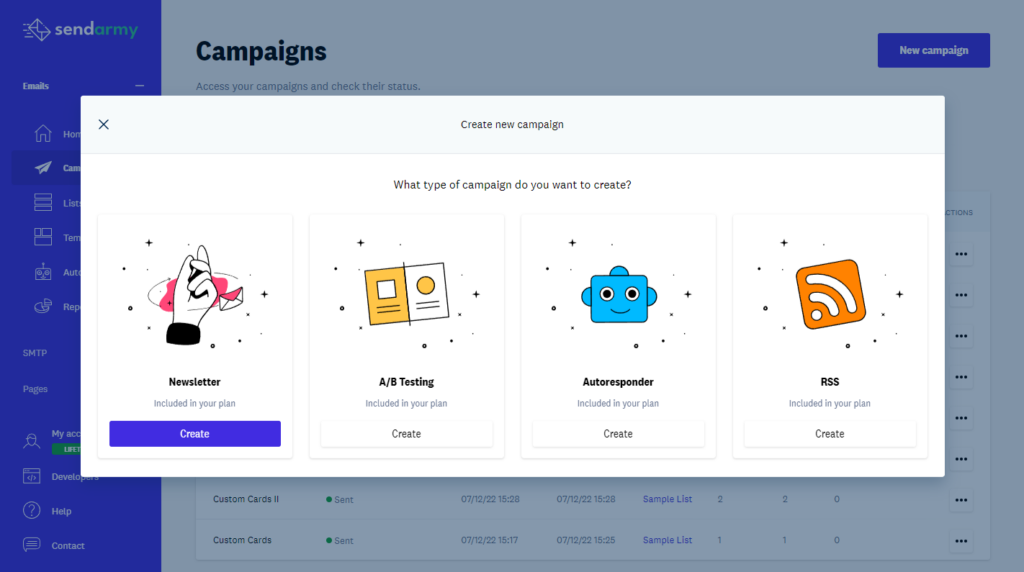
To create your campaign autoresponder, go to the dashboard and click New Campaign. Once there, click on the Autoresponder’s Create button.
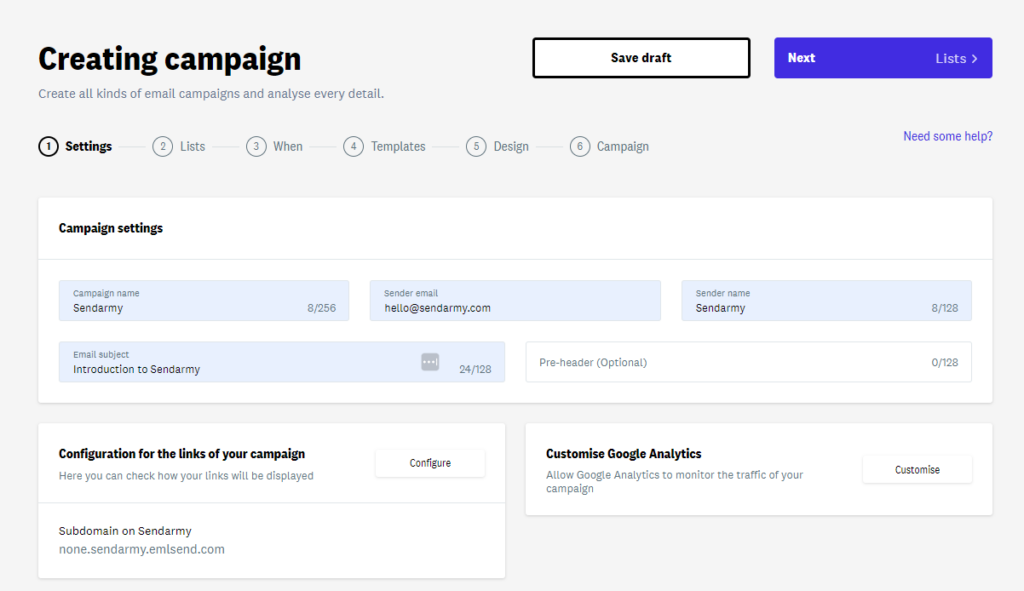
Step 1: Configuration
The first step for creating a campaign is filling in the same fields as in a normal newsletter campaign:
- Campaign name (for internal use)
- Sender’s email and name
- Pre-header (optional)
- Customizing links to your domain
- Google Analytics settings
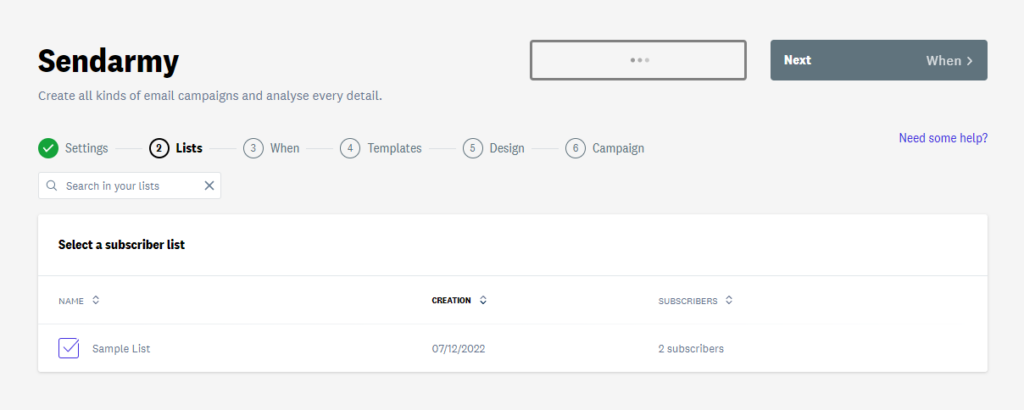
Step 2: Lists
In this step, you will be able to select the list that your autoresponder campaign will receive.
Keep in mind that you will only be able to select a single list of subscribers without the possibility of sending it to a segment within the list.
Trigger Selection
For this step, you can select the trigger you want to start your autoresponder campaign and the fixed sending frequency.
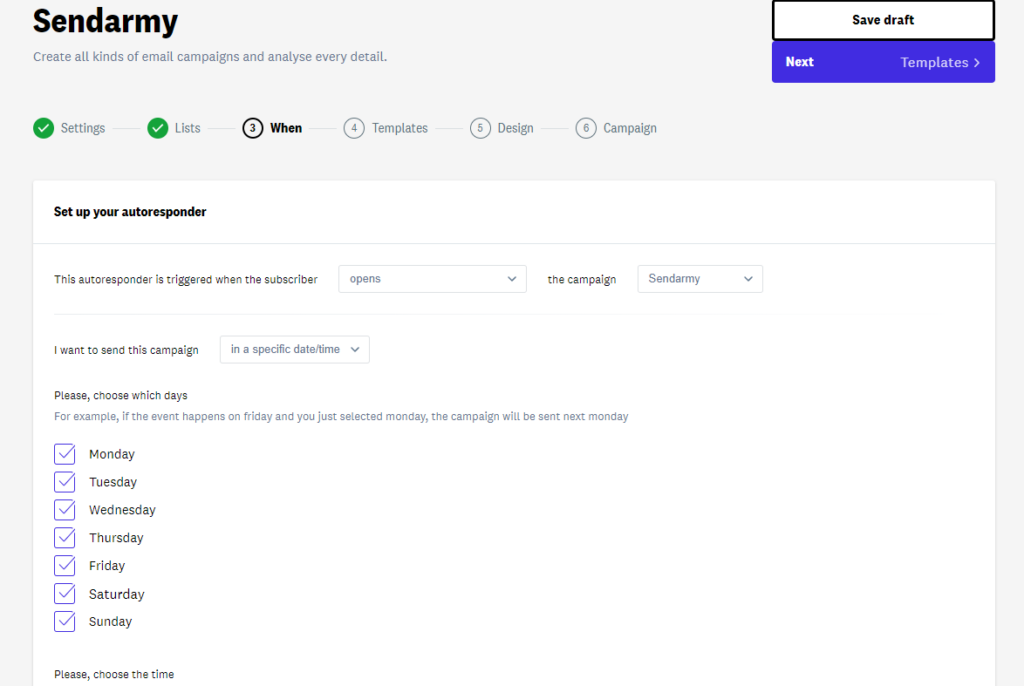
The types of triggers you can select are:
When the Subscriber opens a campaign
The autoresponder will be automatically sent to subscribers who open a previous campaign already sent.
You can select previous campaigns already sent by clicking on the drop-down menu once you select this option.

When the subscriber clicks on any link in a campaign
The autoresponder will be automatically sent to subscribers who click on any link within a particular campaign.

When the Subscriber clicks on a specific link in a campaign
The autoresponder will be automatically sent to subscribers who click on the selected campaign link.

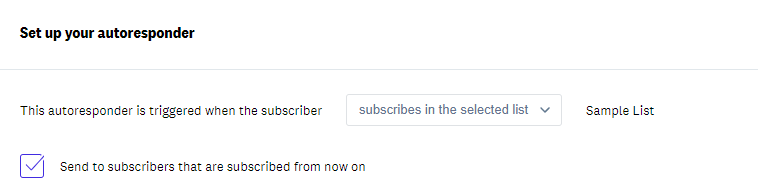
When the subscriber signs up for a list
The autoresponder will be sent automatically to subscribers who register on the chosen list.
You can choose whether you want them to receive this autoresponder only to subscribers who sign up from activating the campaign or that it is also sent to subscribers who were already on the list.
When a subscriber date field matches today’s date
The autoresponder will be automatically sent to subscribers whose chosen date field matches today. This feature allows emails to be sent on specific dates, such as birthdays.
Then, select DD/MM if you want it to be sent annually each day that matches the date (for example, a birthday) or DD/MM/AA if you want it to be sent only once (for example, when you reach a certain age).
Sending time
Once the trigger type has been chosen, it is only necessary to define when it will be sent. You can choose between these two options:
Definitively
A few days (or a single day) of the week and one hour are selected, and it will be when the autoresponder is sent to subscribers who have fulfilled the selected condition.
For example, we may send a welcome email to the list only during the days of the week and not on weekends.

When X time elapses after the event
A time is selected, and when that time elapses after the above event, the time will be sent.
We can select this option if we want to send something specifically a couple of days after the subscriber opens a certain campaign or clicks on a certain link, for example.

X time before the event
Finally, you can send a campaign autoresponder before the selected event is completed. For example, one day before the subscriber’s birthday.
This option will only work for the date trigger.

Check reports
You can check the reports of your autoresponder campaign in the Reports section of the platform. To learn more about how to interpret and improve your results, visit this article about it.